To import customer data into portatour®, it was previously necessary to split the customer data: one file per representative with their respective customers. These files then had to be uploaded individually. Fortunately this is no longer the case.
As of this update, it is now also possible to upload a single file with all customers of all representatives. The only important thing is for the file to contain a separate column for each customer with the corresponding representative – either an e-mail address or employee number.
Here’s how it works:
- Open the Options as administrator or supervisor.
- Click Import data in the company-wide section Data management .
- Select from the menu which data you want to import (Customers, Appointments, Tasks, Reports).
- Follow the steps in the import wizard, which you already know from importing data for an individual user (see the online help for more information). If you have already saved an import configuration, you can use it now.
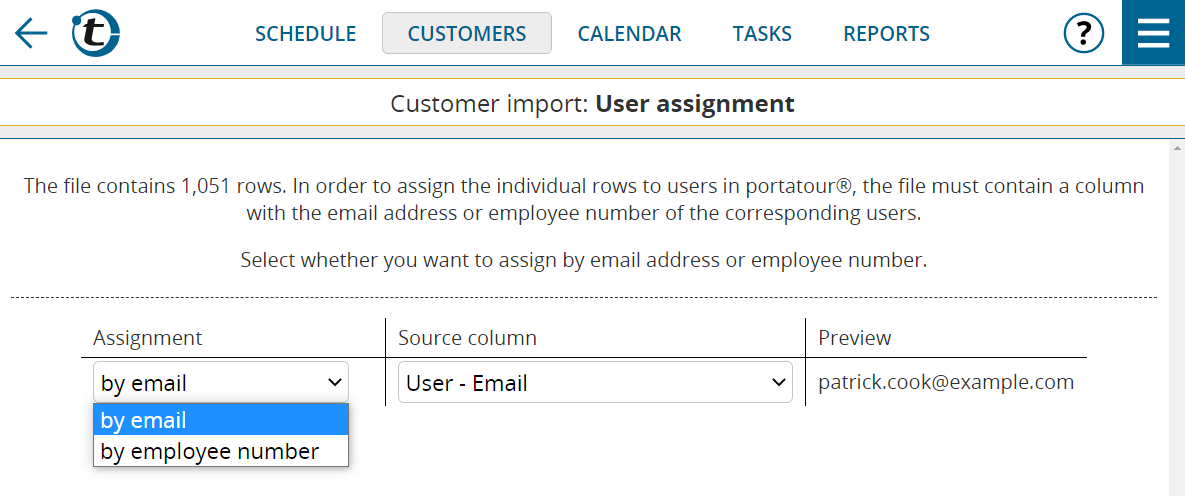
- On the new User Assignment page, select whether to assign customers to users by email or employee number. Note: if you use employee numbers, make sure that they are saved correctly for the individual users in the portatour® User Management.
- On the new page User Selection check that the users found and the number of rows to be imported are correct.
- If the assignment did not produce the desired result, check the correct spelling of the e-mail addresses or preciseness of employee numbers both in the import file and the User Management.
- You will also receive a message if there are no rows in your import file corresponding to users in portatour®.
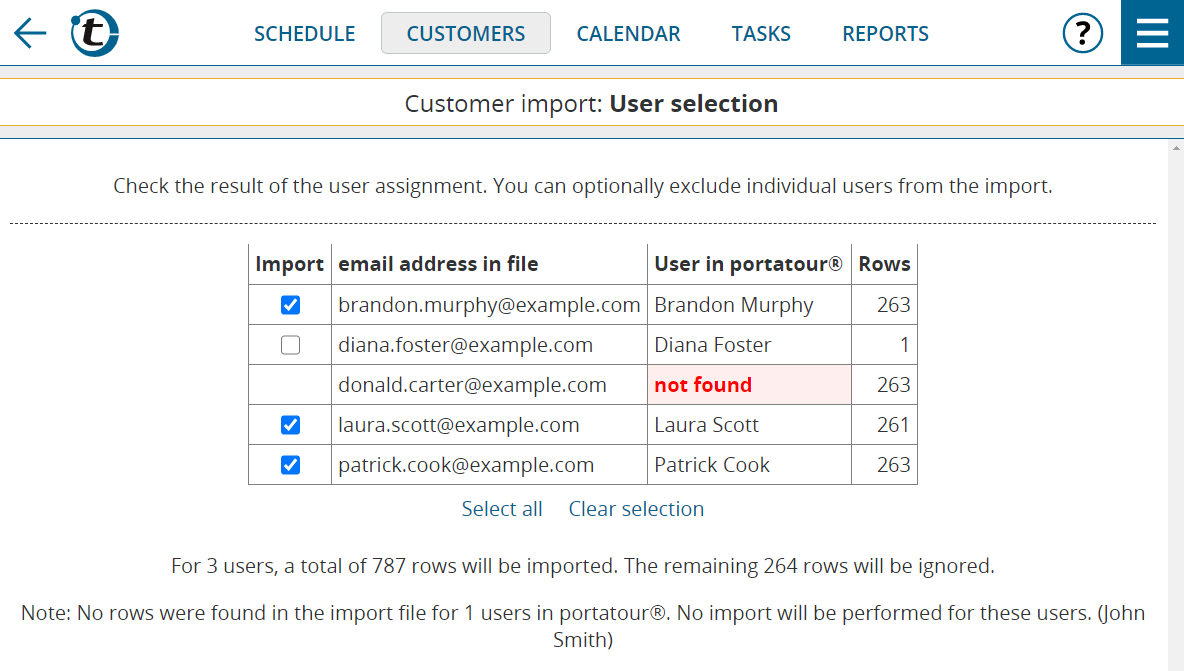
- Uncheck the Import checkbox for those users you wish to exclude from the import.
- Follow the steps of the import wizard that you are already familiar with.
- You will now see the preview for the first user. Check this in the usual manner.
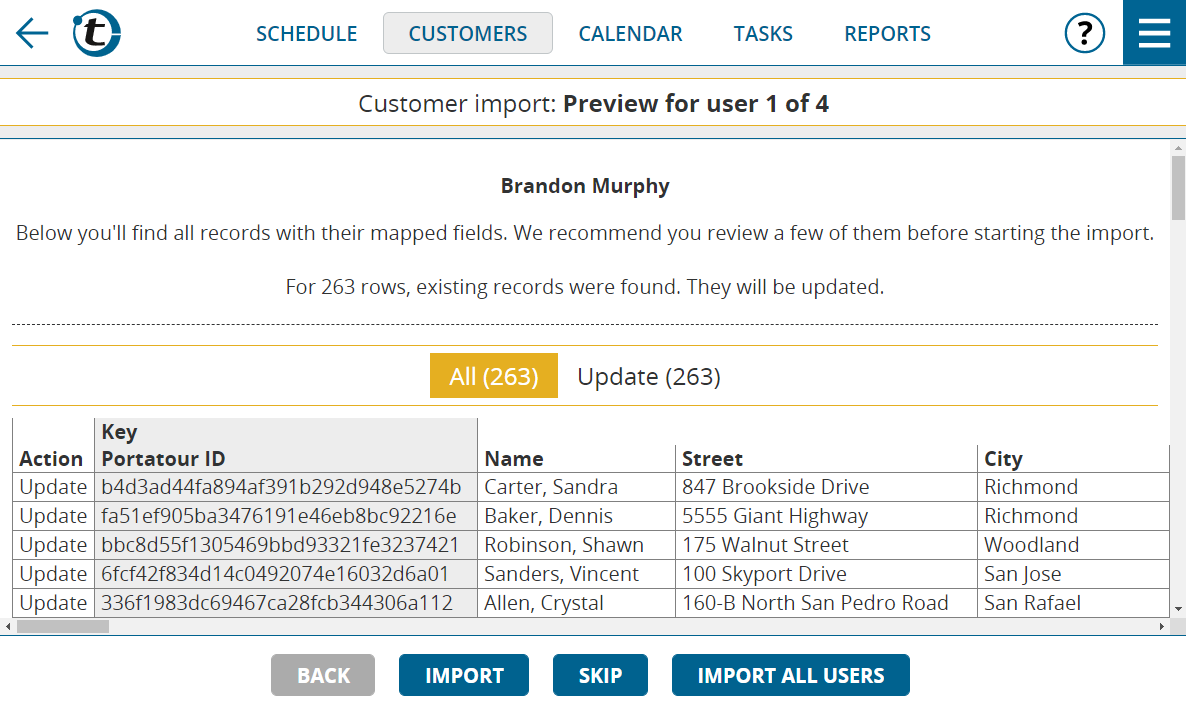
- Decide how you wish to proceed:
- Click Back if you encounter problems in the preview and want to make changes to the settings.
- Click Import once the preview is correct and you are ready to import the data for this user. You will see the result of the import for this user in a summary. The preview for the next user follows.
- Click Skip if you do not wish to execute the import for this user and to continue with the preview of the next user.
- Click Import all users if you want to perform the import for all other users as well without checking the preview per user.
- Tip: use this option only once you have thoroughly checked that the data and settings are correct for several users having imported them.
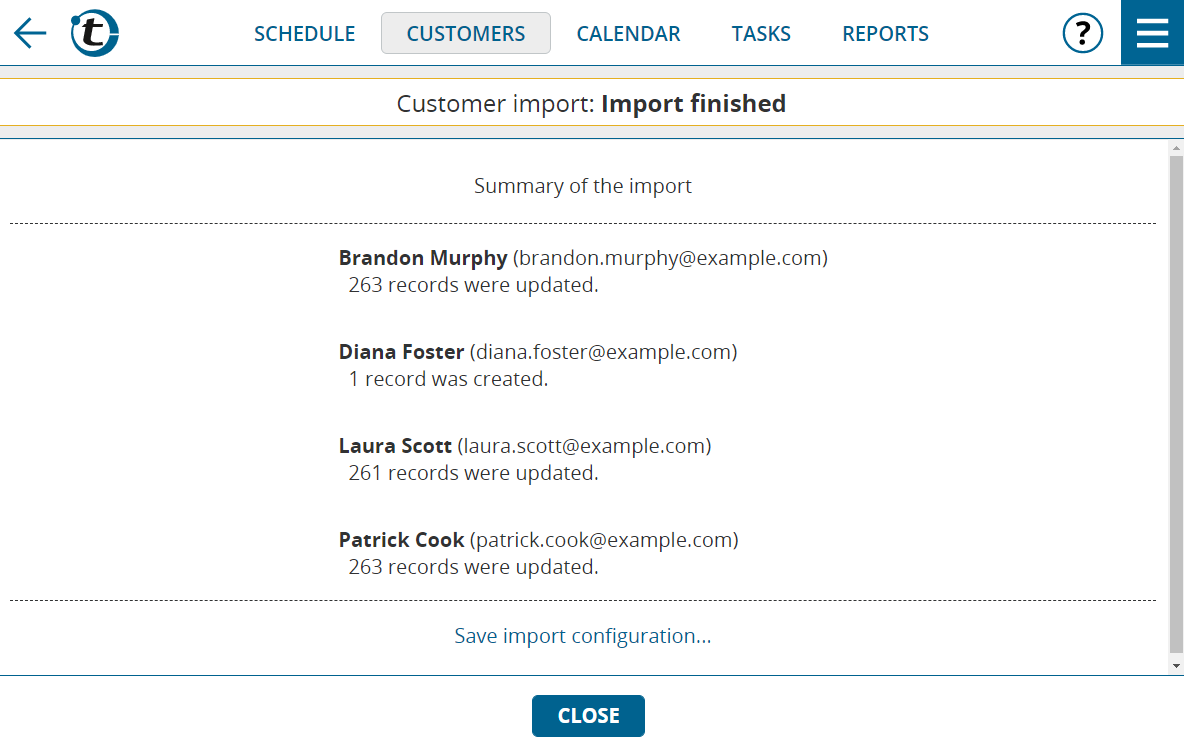
- After the last user, you will see an overall summary. There you can also download the import configuration.
Bear in mind:
- When you upload an Excel or ODS file, all rows must be on a single spreadsheet. The assignment of customers to users must be made by means of a column (e-mail address or employee number) as described above, and not by means of separate worksheets.
- The limits for the import are 100,000 rows and 100 user accounts. If these limits are exceeded, the process is aborted. In this case, manually split the import file into several files. Alternatively use our API scripts for automatic splitting and uploading.
- A company-wide restore point is created for all user accounts before the import process. If the import process produces an unexpected result, for example due to an incorrect import file or incorrect field mapping, revert to this restore point, either company-wide for all users or for individually-affected user accounts. Bear in mind that any data entered by users in the meantime will be lost.
- The import functionality is not available if you use portatour® in combination with Salesforce or Dynamics CRM. The data is automatically synchronized from there.